Contents
If you are reading this post, you may have heard of the good things that a child theme bring. Most of the time, you like the look and feel of the parent theme, however, you still need to modify a bit to your liking. This is the perfect case to create child themes in WordPress. Another example is when you want to alter some functionalities of the parent theme such as change the WooCommerce shop page design. Once you know how to create a child theme, there are many great things you can do. Without further ado, let’s learn how to create child themes in WordPress.
There are two ways you can create a child theme in WordPress. If you are comfortable with creating folders and files, then take a look at the second method below. However, if you want an easy way, maybe using a plugin to create your child theme is the right way.
Create child themes in WordPress using plugin
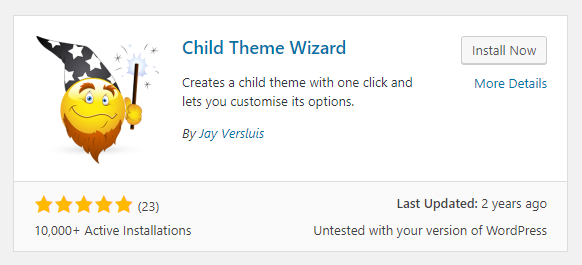
We are going to use a plugin called Child theme wizard. Let’s go to Plugins->Add new and type Child theme wizard in the search box:

Let’s click on Install now and wait until the text on the button change to Activate. Click on Activate.
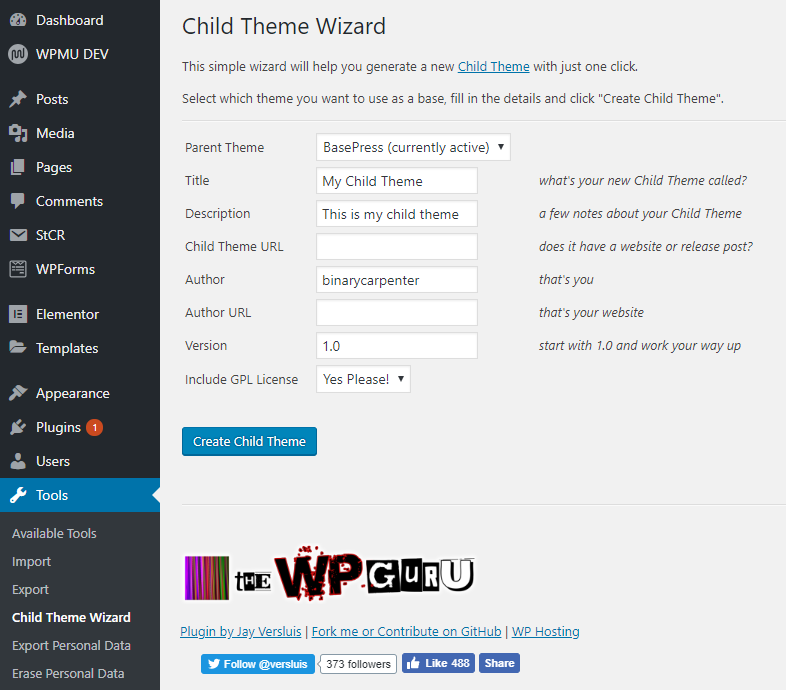
Now, go to Tools->Child theme wizard:

If you are creating a child theme, chances are you want to add styles or function to the current active theme. Thus, you should leave the parent theme as the currently active one (however, you can create a child theme for any theme available in your themes folder).
Next, let’s enter some details. You can enter anything you like in these boxes. When you are done, click on Create Child Theme.
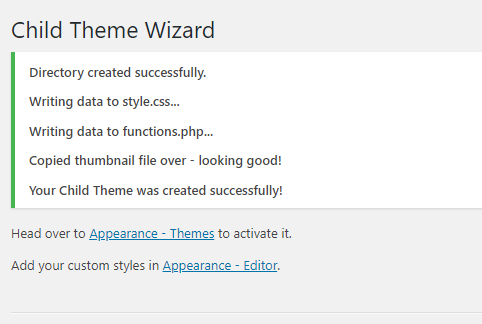
After a few seconds, you should see this notice:

The child theme was created successfully.
Now, let’s go to Appearance, you should see the child theme listed there:

Now you can activate the child theme and write additional styles and functions to your site.
Create WordPress child theme by manually creating the theme files
If you want to create the folder structure for the child theme yourself, let’s follow the instructions below:
Here are the steps we are going to do to create a child theme
- Locate the parent theme that you want to create a child theme for
- Create a folder to host the child theme’s content
- Create the style.css file inside child theme folder to declare its information
- Activate the child theme in WordPress dashboard
Let’s go through the steps above. In this post, I’m going to use my local development server (which runs Windows). However, you can apply the same concept to create child themes on cPanel or even through linux command line. If you need help, please let me know.
Locate the parent theme that you want to create a child theme for
The first thing you need to do is to find out which theme you want to create a child theme for. Let’s go to your wp-content/themes folder. Here I have some themes available:

I’m going to create a child theme for the theme storefront, which is the default theme of WooCommerce. It’s totally depend on you to pick the parent theme.
Create a folder to host the child theme’s content
Our next step is to create a folder to host the child theme’s files. I’m going to create a folder called storefront-child-theme. You can give the folder any name you want. However, the name should (not must) make it obvious to see the parent-child relationship. Some other good examples for child theme’ names are:
- storefront-child
- storefront-extend-theme
Now, in our wp-content/themes folder, we have these folders:

Create the style.css file inside child theme folder to declare its information
Our next step is to go to the child theme’s folder and create a file named style.css. This is the must-have file of any WordPress theme. Let’s enter the following details in style.css:
/*!
Theme Name:   Storefront Child Theme
Theme URI:    https://binarycarpenter.com/?p=1158&preview=true
Author:       Dat
Author URI:   https://binarycarpenter.com/
Template: storefront
Description:  This is the storefront child theme
Version:      1.0.0
License:      GNU General Public License v2 or later
License URI:  https://www.gnu.org/licenses/gpl-2.0.html
Text Domain:  storefront-child-theme
Tags:         e-commerce, two-columns, left-sidebar, right-sidebar, custom-background, custom-colors, custom-header, custom-menu, featured-images, full-width-template, threaded-comments, accessibility-ready, rtl-language-support, footer-widgets, sticky-post, theme-options, editor-style
*/
There are quite some fields here (each field stays on one line). However, there are two fields you need to pay attention to. Those are Theme Name and Template.
These two fields are required and they have some strict rules you must follow:
- For the “Theme Name” field, you can put anything you like in here but it must be unique across all your themes (on your site).
- For the Template field, the value of this field must match the FOLDER NAME of this theme’s parent theme. In this example, the parent theme’s folder is storefront so I put storefront in the Template field. You should put this value according to your parent theme.
Let’s save the file and go to the next step.
Activate the child theme in WordPress dashboard
Now we have successfully created the child theme for storefront. Let’s go to Appearance->Themes inside WordPress dashboard to activate it:

As you can see, we now have a new theme called Storefront Child theme. Let’s hover on it and click on activate. The site is now running our new child theme. Now you can start working on writing custom CSS styles, additional functions in the functions.php files…
Conclusion
Child themes bring a lot of flexibility to your WordPress site. Knowing how to create and work with child theme is important, even when you are not a developer. Child themes let you customize the styles and also add new functions to the parent theme. Hopefully the post has been helpful to you. If you have any questions, please let me know in the comment below.


![[Fixed] Why Does Yoast Not Generate A Sitemap - Sitemap_index.xml 404](https://www.binarycarpenter.com/wp-content/uploads/2018/04/server-404.jpg)