Contents
Google fonts is a great way to enrich your web typography. There are thousands of fonts available for free. If you have been using new WordPress themes or plugin, you may see that many of them let you pick fonts from Google repository and add to your site. However, you don’t have to use a theme or a plugin to get Google fonts. In this post, I’m showing you the easiest way to install Google fonts in WordPress. You’ll be surprised at how quick it is.
Select a font in Google fonts
The first step, obviously is to select a font form google fonts. Let’s head to https://fonts.google.com/ and pick the fonts you prefer:
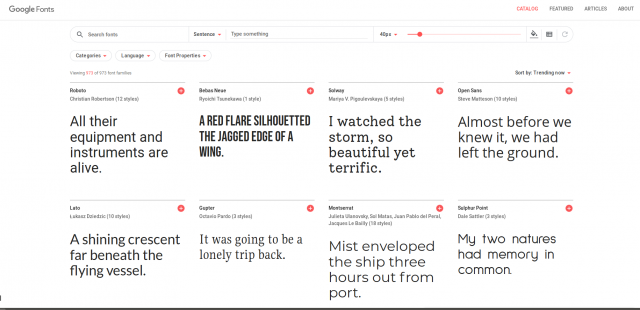
As you can see, there are many fonts available. Simply click on the orange plus icon to add it to your list of select fonts.
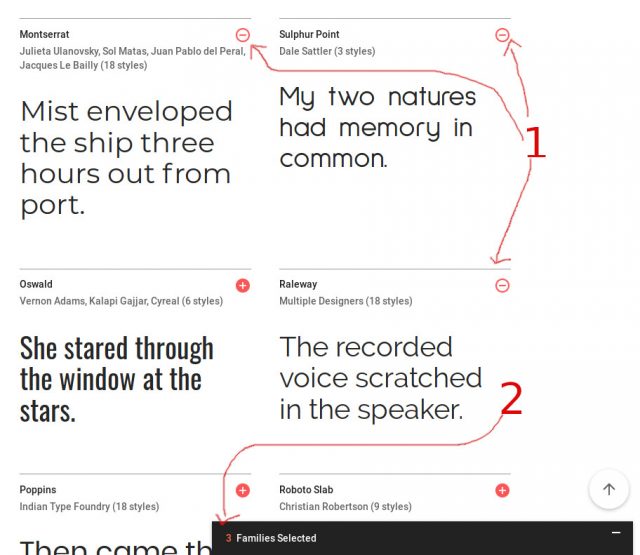
As you can see, I have added three fonts to my selection. The plus signs were turned to minus so you can remove those fonts in case you need it.
A black box appears at the bottom right of the screen showing the information of the fonts that were added. If I click on that box, there will be a bigger window slide up contains some useful information as well as the installation instructions:
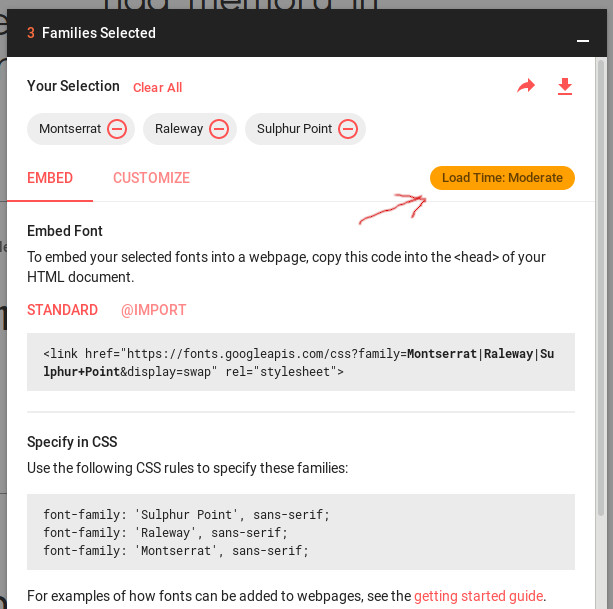
There is one important thing to notice here. There is an orange box says “Load time: Moderate”. This isn’t a good sign because it tells us if we add all these fonts, it will negatively impact our page load time significantly (Adding more fonts, even just one will slow down your site).
Try to remove the fonts you don’t really need. Normally, I select at most two fonts. Let me remove one font so I can get load time: fast.
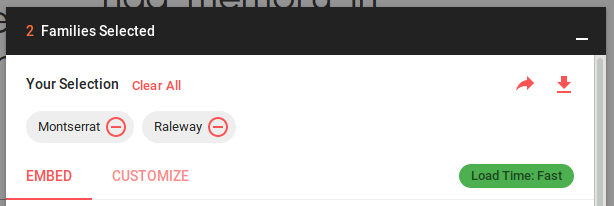
Before installing the fonts to our site, let’s click on the customize tab.
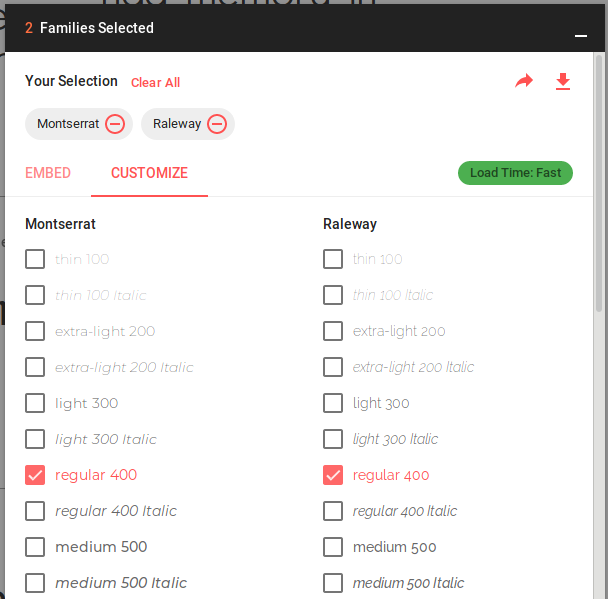
Here, you can see a list of font-weight and style that you can add. I currently have the regular font weight for both fonts. Adding more styles let you pick more variations for your fonts. However, similar to font family, adding more font styles adds time to site load time. So, you should be very frugal when picking more styles.
How to install Google fonts in WordPress
Let’s head back to the embed tab and grab the installation info:
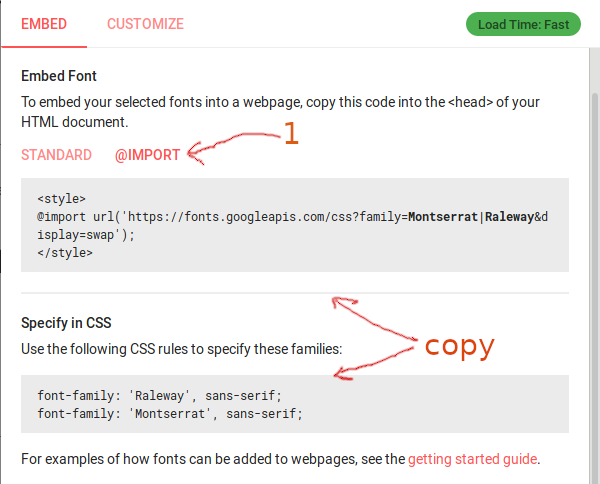
First, you need to switch to the @import tab. Installing the fonts using the snippets in the standard tab takes more time and require a bit of coding skill (though not much).
Let’s copy the code in first box but excluding <style> and </style>.
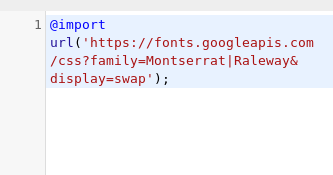
Where to put this code? You may ask. Well, let’s go to our site’s dashboard and go to Apperance->Customize-> Additional CSS and paste the code there:
Now, for the second part, let’s copy it. However, before you can paste it, you need to know where do you want to use those fonts. For example, in my case, you want to use Raleway for the whole site, you need to write this in the Additional CSS box:
body { font-family: 'Raleway', sans-serif; }If you want to use Raleway for body text and Montserrat for the headings, you can place the rules like this:
body { font-family: 'Raleway', sans-serif; }
h1, h2, h3, h4, h5, h6 { font-family: 'Montserrat', sans-serif; }
If you want to use, say Raleway for the sidebar only, you would put this rule in additional CSS box:
.widget-area { font-family: 'Raleway', sans-serif; }If you want to apply a specific font for the content body only, you would like to put something like this:
.content-area { font-family: 'Raleway', sans-serif; }These rules will work in most case (if your theme adhere to WordPress theme structure standards). However, you can easily use the inspector tool on your browser to find the CSS selectors to apply the fonts.
Conclusion
Now you know how to install Google fonts in WordPress. However, while it is easy to install those pretty fonts, it is also easy to add many fonts and make your site load slowly. It is best to select one or two fonts and strive for the load time: fast for the best results.


